Stencil Art is a great way to make your own T-Shirt designs, or personally emblazon your
crates, boxes, gear, car, house, neighborhood, pets, or elected officals.
With a very minimal amount of materials and a little practice you can leave
your mark all over the place!
Materials:
- Paper
- Pencil
- Eraser
- Blunt Sharpie marker
- Low tack spray adhesive
- Thin plastic, cardboard, etc.
- X-acto knife with several new blades
- Access to a copy machine / printer
- GOOD spray paint (Krylon, eg.)
|
Creating Your Design:
Creating your design
All Zerothousand stencils have been designed and field tested by our team of
experts. We encourage you to make your own designs, but want to
remind you that stencils a re a very particular media, and you have to
adjust your creative ambitions to accommodate their limitations.
Decide first of all, if you want to make a traditional "positive" stencil,
with the design being cut from a mask ( a hole in a piece of material) or a
"negative", where your design is a stand-alone piece of material that is
defined by the paint that over sprays it.
In either case, you have to keep in mind that A: tiny, fine lines and
details will be very fragile and difficult to execute, and B: that you can't
have any element that is floating or "orphaned" without being connected by a spur to the material
of the rest of the design.
Picture the letter "A", and how the little triangle inside would need
an arbitrary bar or two added, so that it could remain attached if you were
making a positive. In a negative, it would not, however, as the "A" itself
is the part you keep, and all of its elements are already connected
.
When making a design, I always use a pencil to work out the design itself,
determining where and how I'll link all the elements, then I'll trace it
with a blunt sharpie, ensuring that nothing is too thin. I'll also fill in everything that
I'm expecting to see ultimately painted. Often this step will reveal areas that need to be
re-done- it gets tricky on the more complex designs, keeping track of what is printing and
what isn't.
Once you have your final design, make a copy, at whatever size you need. DO
NOT cut up your painstakingly crafted original!
Send us a copy, or give to your friends, always saving your original so you
can make more. I cringe at the thought of how many beautiful, time consuming
designs I've seen others make that are rendered unusable after a few applications.
Making the stencil:
- 1: Print design- reduce or enlarge to suit your needs.
- 2: Using a glue stick, or light bond spray adhesive, attach
to your substrate.
- Thin sheet plastic, such as polyethylene works best, but cardboard, styrene, or
really anything you can cut easily with an X-acto blade will work.
- 3: Start by cutting all of your inside corners, by pushing the blade
straight down, then rocking it back along the cut line (this keeps you from over cutting your corners, or undercutting them and
tearing them out later.
- 4: Cut the rest of your lines
- Generally it is best to pull your cut lines,
rotating the piece as you go.
- Keep your blade very sharp (I change mine a few times per design sometimes...) A dull blade is far more likely
to cause you to push too hard and sever an important piece!
- 5: As you finish, and are removing the discarded portion, go slowly and note
if any cuts failed to go all the way through.
- Cut these
areas with your blade pushed all the way through, using a gentle sawing
motion.
- If done correctly, your Stencil will have
a much greater lifespan, as it is far less likely to tear out in the
corners.
Application:
- 1: Make your surface as flat as possible.
- if you are painting a shirt, for example, insert a cookie sheet, or other rigid material,
pull the remaining cloth tight, and tape in place.
- Don't stretch the shit out of it though, as your print will end up distorted.
- 2: Apply a light coat of low tack spray adhesive to the back side of your stencil.
- 3: Center your stencil on your surface, and place it gently on the surface,
making sure that it remains flat.
- 4: If necessary, adjust the surface/stencil to remove any wrinkles.
- 5: Once your stencil is resting flat on your surface, press firmly along the
perimeter of the cut design, so that the adhesive on the back side
makes a seal.
- You only need to press on the very edge (a finger's width is
fine) the purpose of this step is just to keep the paint from
creeping under the edge and make your print blurry- you needn't weld the
entire stencil to your surface...
- 6: place newspaper, pizza boxes or whatever around your design, to prevent
over spray. Tape them in place as necessary.
- 7: Do NOT use shitty store brand spray paint- You will have a messy, ugly
print. Krylon is my personal favorite,
with the ultra flat black being a particularly good one.
- Shake thoroughly
and do a test spray on a piece of scrap.
- You want about a 2" dot of spray that is nice and opaque. If it looks runny
or transparent, shake it a bunch more.
- 8: Spray your design
- *This is the trickiest/most important step*
- Hold the can about 8" to a foot away from your surface (shoot for that 2"
dot of paint) .
- You want to spray as perpendicular to the stencil as
possible, in a straight line, back and forth like a printer.
- If it helps, you can make that shrill "vreeeeeet, vreeeeet,
vreeeeet" noise that old dot matrix printers used to make to remind
yourself.
- Start your stroke just before your design, and hit the button right at the
edge, laying down a nice even line.
- Release the button as you pass the opposite edge and then stop your arm movement.
- Return and do it again, overlapping the previous line slightly.
- Go all way down until you have filled the stencil area.
- STOP.
- "But, but, but, it's not quite dark enough!" you say...
- Fine, we'll go over it again... IN A FEW MINUTES!
- DO NOT soak your design is a massive deluge of paint
- You will dramatically shorten the life span of your stencil, fuck up your print, and waste paint.
- If your line gets too heavy, increase the speed you are moving your arm-
don't hesitate or dwell in any area, or you'll have a weird, heavy dot.You
will make a big mess, too.
- Once the first layer is dry, go ahead and repeat your application process.
- This time, turn your project, (or yourself) so you can apply your line of
paint at a slightly different angle, and you can back up a bit, so you've
got a bit larger, more diffused "dot ".
- Again, if it looks a bit patchy, wait until this layer dries before you do any touch up.
- Once everything is dry (including the paint on the stencil itself) peel off
all your masking, stencil, etc. and remove from the cookie sheet, board, or
whatever. Doesn't that look nice?
- If you have just wrought a truly awesome garment, it may be difficult not to
put it on right this very minute, which is fine, and shows excellent
character, though you will likely get high off the xylene fumes, so don't drive.
A few additional tips:
- If you are printing a bright color on a dark one, use white or silver as
your first coat. It's really tough to get good results when spray painting
dark fabric
- You can use a makeup sponge applicator and silk screen ink as an
alternative, just be sure to follow the instructions for setting the ink.
- Another fun variant for dark fabric is to use a spray bottle of bleach, set
to as fine a mist as possible. Experiment with the concentration- full
strength bleach is pretty ferocious. You can dilute with varying amounts of water to get different results.
- By placing spacers under the stencil (bottle caps, rulers, etc.) you can
get a nice blurry drop shadow effect, which you can follow with a crisp,
glued down print of the same design.
- Play around with filters. I've used a speaker grill, lace, other stencils,
etc. as an intermediary layer, which rests above the design itself.
- You can also overprint a light layer with a darker one, selectively, to
create a gradient effect. You could for example, cover the lower half of a
red image, with black or purple, increasing the spray distance with each line, to get a nice blend.
- Try rotating or slightly shifting your stencil, and only doing a light
coat of paint each time. The areas that overlap will end up darker, and
you'll get a nice stuttered, blur effect at the edges.
- Set tall objects at the edges of your stencil, and spray at a low angle, so
that a "shadow" is cast where they block the paint.
- Use clear plastic as your surface, with different images stenciled on each
side.
- If painting on a metal surface, you can use magnets to anchor the stencil
rather that adhesive.
- If your material is a T-Shirt, or other commercial fabric apparel, wash
it first! Otherwise the paint will bind to the fabric sizing and wash out
with it on it's initial wash. If the shirt is prewashed, this stuff will be
rinsed out, letting the paint bind directly to the fabric, giving a
longer life to the design.
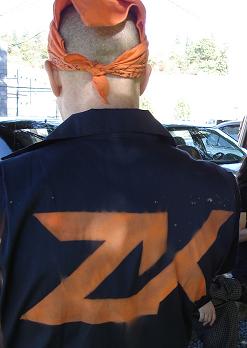
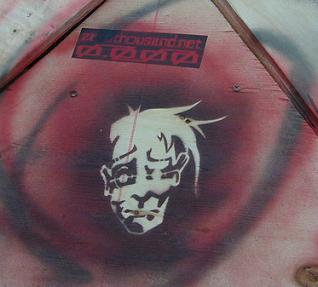
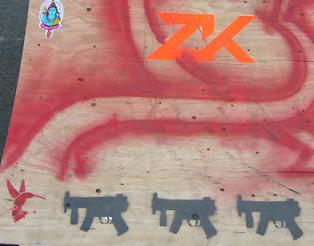
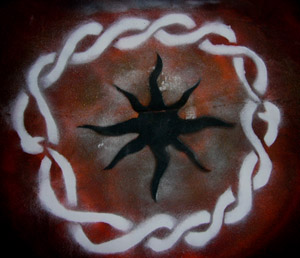
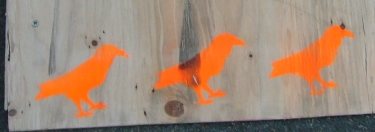
We have some templates available for you to print, cut out, and start
stenciling all over. These are free for your use. Watch this space for more
designs as we get them formatted
|

ZK Stencil Templates are licensed Creative Commons
NonCommercial-ShareAlike 2.5 License.

 |